
You will learn how to set up and moderate diaries and bulletin boards in Quallie.
- What is diary/blog module
- Project setup
- How to create a new diary activity
- How to moderate diaries
- Comments and discussion forums
- Activity table
What is the Diary/Blog module?
A diary is ideal for activities where respondents are asked to submit longer, open-ended responses — with the option to attach photos or upload videos. As an asynchronous method, it gives participants time to reflect, often resulting in richer and more detailed answers than those typically found on bulletin boards. It’s well-suited for use cases like ethnography, unboxing, or any task that benefits from personal insights shared over time.
Examples:
- Visit your local XYZ store and evaluate its layout and design. What do you like or dislike about the setup? Feel free to attach photos or a short video.
- We hope you’ve received our test package of XYZ spices. Please prepare a quick dinner using the spices, describe your experience, and share a few photos of the result.
- Make a short video showing the contents of your fridge. Briefly explain why you use each item or prefer specific brands.
1. Project setup
First, create a new project. This video shows you how — just click the play button to start:
2. How to add a new diary activity
The following video explains the key differences between bulletin boards and diaries, and shows how to add them to your project. Click the play button to watch.
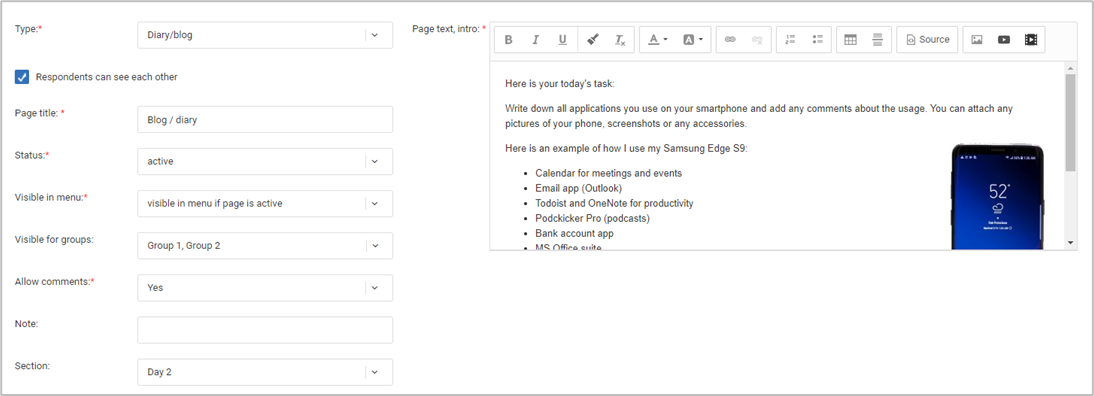
Here is a screenshot of the page settings:
How to moderate diaries
Your project can have one or many activities for respondents. Each activity is represented by one page in the activity menu. The list of activities is displayed on the project overview page, or you can visit the separate admin section called Pages.
To communicate with respondents, select the specific activity (page) by clicking the arrow next to it in your activity list, or use the Enter button on the right. This will open the discussion interface.
As the moderator, you can see everything respondents have submitted — including draft posts they haven’t published yet. You can also add comments, likes, or dislikes to any post.
Let’s look at the front-end view. Here is how a new diary task looks from the respondent’s perspective:
You can see the assignment from the moderator on the top and the text editor below it. Here respondents type their answers.
They can format the text and it’s also possible to upload images from their devices (laptop, cell phone, tablet) by clicking the image icon in the top left corner of the editor. Emojis are also supported.
There is an auto-save function built into the editor, it stores the draft every minute so a respondent doesn’t lose his work if he leaves the page before finalizing it.
Respondents finish their post by clicking the Publish button. This will lock the post and prevent the respondent from changing or deleting it. It also marks the activity as finished.
Both the respondent and moderator can still communicate using the comment section below the main task.
Respondents can also upload videos by clicking the ‘+ video’ option below the text field. This option is available even after the respondent has published his main post.
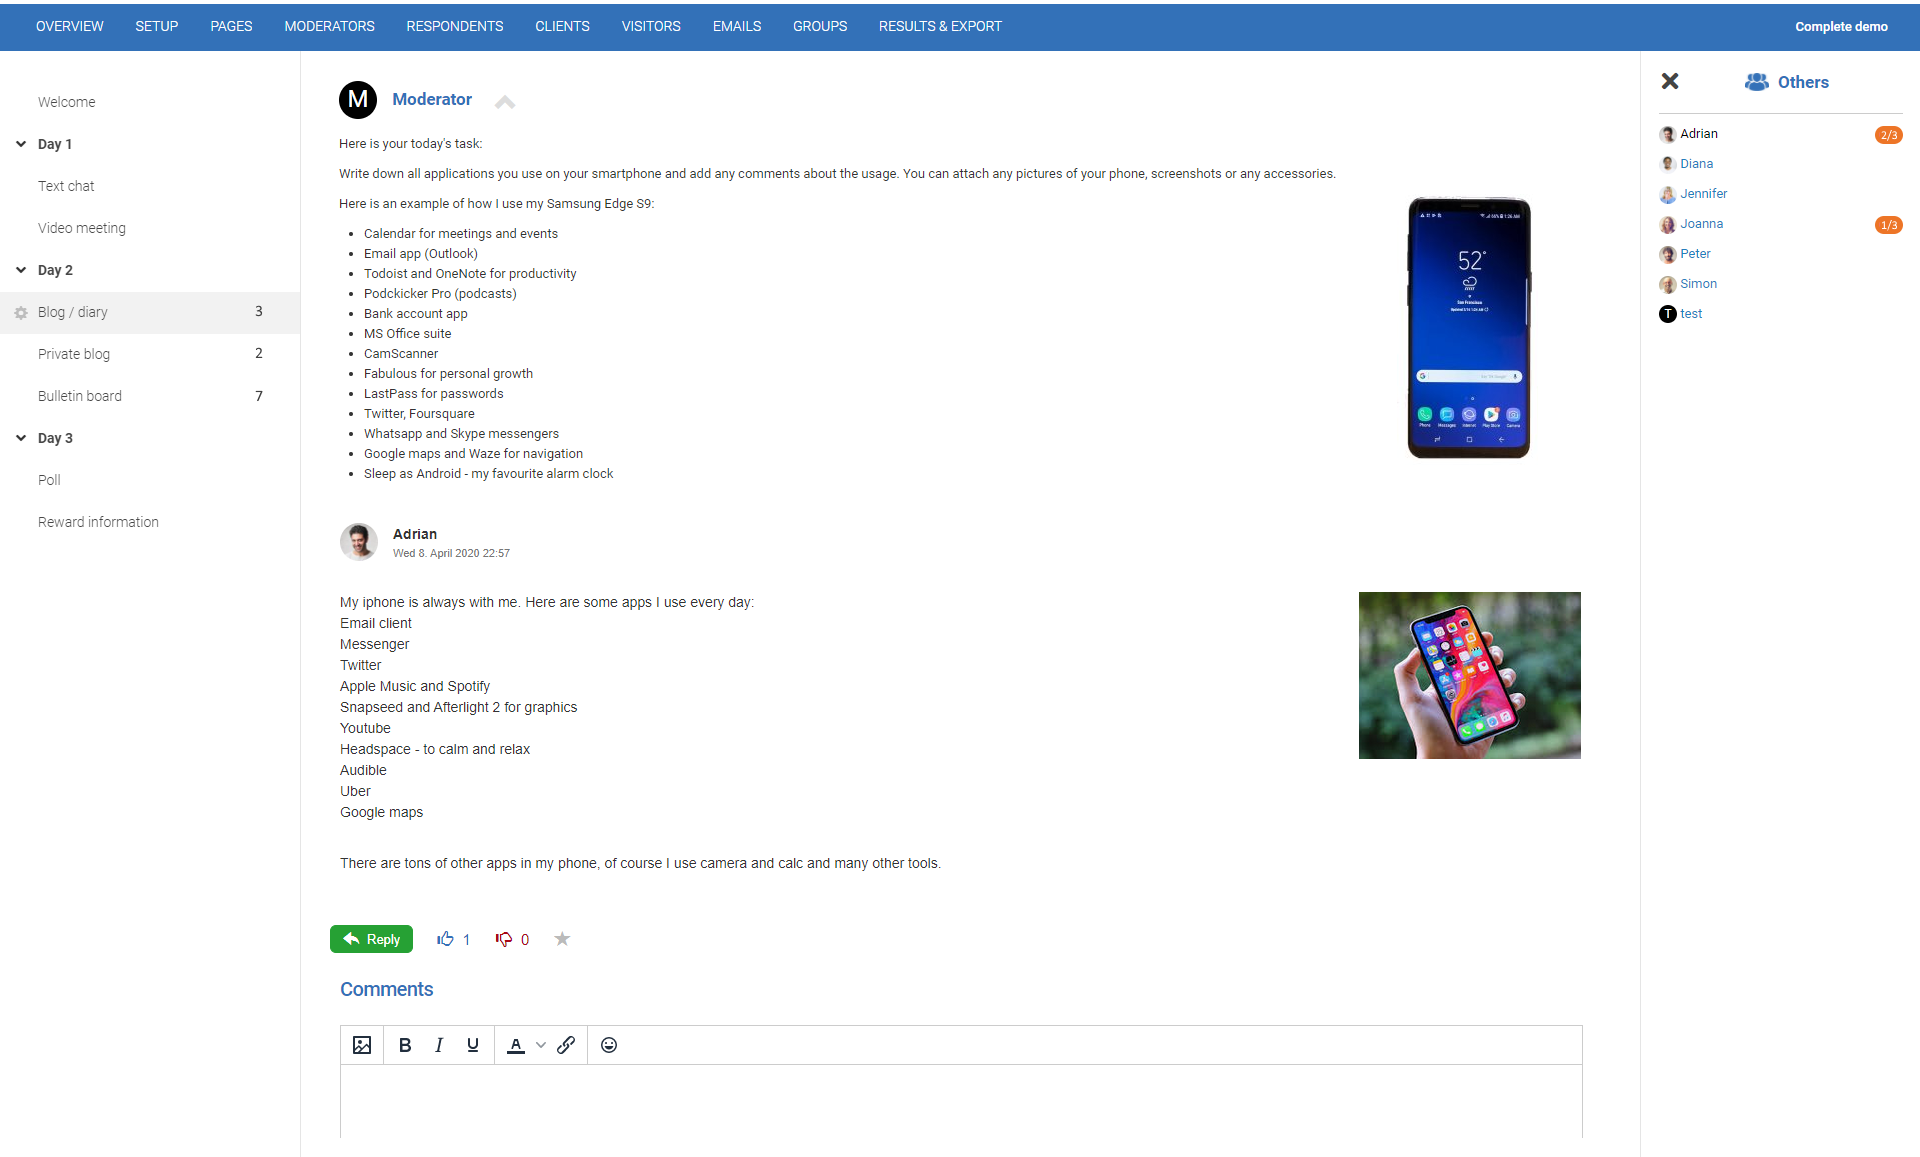
Here is the moderator’s view of the same page after the respondent has finished the task.
The number next to the menu item means the number of new posts or comments added from your last visit.
Notice the small cog icon next to the active activity – you can quickly go to the activity settings by clicking this icon.
You can switch between respondents in the right panel. It’s also available to respondents so they can check the assignments of other participants. The moderator can disable this list in the page settings, so respondents do not see each other – with this option, you are able to create a private diary.
Comments and discussion forums
The discussion board and comments below the diaries have the same functionality. The first is a self-standing activity (page), the second is an additional module that extends the basic diary functionality. They both work in the same way.

Participants use the same editor with formatting buttons, the image upload is also available.
The post is submitted by clicking the blue arrow button.
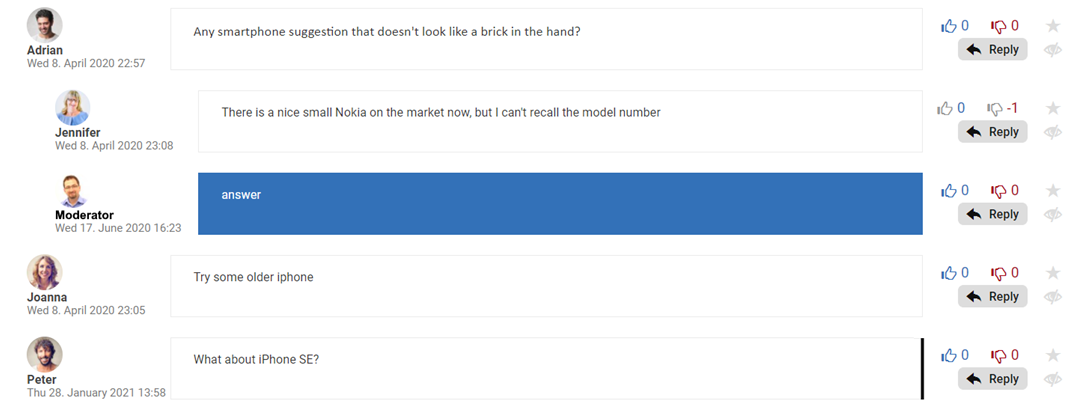
New comments submitted from your last visit are marked by a black left border, so you can easily recognize them in the long threads.
Moderator’s comments are highlighted in the discussion, so nobody can overlook them.
There are several tools available only to moderators. The moderator can hide a specific comment by clicking the grey eye icon. By clicking the star icon, the moderator will mark this post. This can be helpful in the export where there is an option to filter only the marked messages, for example, the most interesting answers.
Activity table
If you need a complete overview of the project progress, the following table might be helpful. Go to project overview and click the Activity table link.
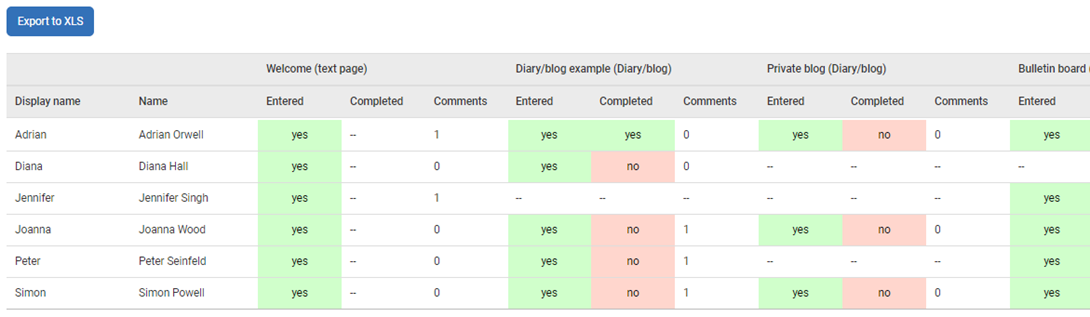
The overview shows all respondents in rows and all activities in columns. There is a breakdown of Entered / Completed / Number of comments for each activity and respondent.
Entered: means respondent visited the activity at least once.
Completed: means they clicked the Publish button in the diary, or the Complete button in the poll. Please note that text pages, bulletin boards, or chats cannot be completed because they don’t have the specific action button to finalize the task.
Comments: represents the number of comments for each respondent’s activity.
The list of respondents and their activities can be very long in some projects, so that’s why we added the ‘Export to Excel’ function so you can download the table and process it locally on your computer.
More features soon
We are continuously adding new features to Quallie, so this document may change over time. We recommend you check our changelog from time to time; or sign up for our newsletter!
More resources:
How to set up a text-based live chat
How to set up a video focus group
Tutorial for moderators – text-based live chat
Tutorial for moderators – video focus group